
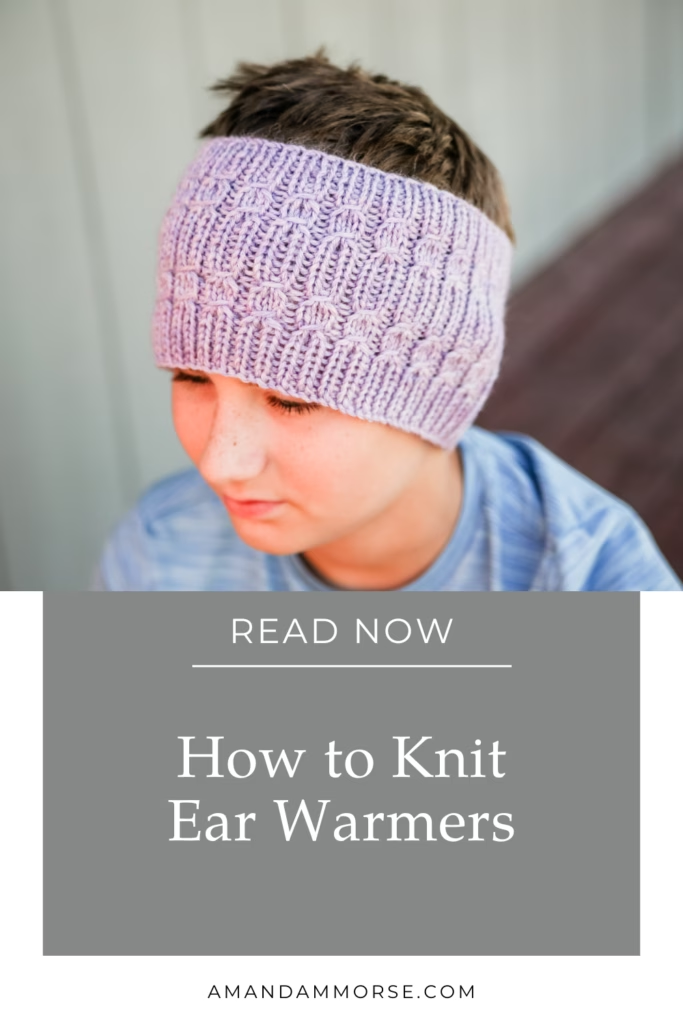
Learning how to knit ear warmers is a great way to make quick, useful projects that fit beautifully into your collection of free headband knitting patterns. Ear warmers are one of those practical knits that give you the warmth of a hat around your ears without covering your whole head, which makes them perfect for messy buns, ponytails, or days when you just do not want full hat hair. If you have been wondering how to knit ear warmers that are simple, wearable, and easy to customize, this guide will walk you through the main construction options so you can choose the style that works best for your project.
Ear warmers can look fancy, but the basic idea is very simple. You are usually knitting a wide band that fits around the head, then finishing it in a way that makes it comfortable and secure.
The fun part is that there is more than one way to make them. You can knit an ear warmer in the round, knit it flat and sew it together, or add a twist at the front for a pretty finished detail.
Once you understand the basic structure, learning how to knit ear warmers becomes much less intimidating. They are also a wonderful project for trying new stitch patterns because they are small enough to finish quickly but big enough to show off texture, lace, cables, ribbing, or garter stitch.
What Materials Do You Need to Knit Ear Warmers?
The materials you need for an ear warmer will depend on the yarn weight, the stitch pattern, and whether you are knitting it flat or in the round. Most ear warmer knitting patterns use worsted, bulky, or chunky yarn because those weights create a warm fabric and make the project faster to finish.
For yarn, soft worsted and chunky options both work beautifully depending on the ear warmer style you want to make. Berroco Vintage is a great everyday worsted weight choice because it has nice stitch definition, is easy to care for, and feels comfortable against the skin. KnitPicks Wool of the Andes is another lovely worsted option, especially if you want a warm wool ear warmer with pretty texture. For a thicker, quicker project, Premier Bamboo Chunky gives you a soft, smooth fabric with beautiful drape, making it a nice choice for a wider ear warmer or a fast gift knit.
For a basic ear warmer, you will usually need yarn, knitting needles, a tapestry needle, scissors, and sometimes stitch markers. If you are knitting in the round, you can use circular needles or double pointed needles, depending on the size of the project and your preferred method.

Worsted weight yarn is a nice middle ground because it gives you warmth without making the ear warmer feel too bulky. Bulky and chunky yarns are great when you want something extra warm or when you need a fast gift.
Needle size matters too because ear warmers should have enough stretch to fit comfortably but enough structure to stay in place. If the fabric is too loose, the ear warmer may stretch out while wearing; if it is too tight, it may not feel comfortable around the head.
When choosing yarn, look for something soft enough to wear near your forehead and ears. A scratchy yarn can make even the prettiest ear warmer sit unused, so this is one place where comfort really does matter.
How Do You Knit Ear Warmers in the Round?
One of the easiest ways to knit an ear warmer is in the round. This method is a lot like knitting a beanie, except you stop before the crown shaping and do not work any decreases.
To knit an ear warmer in the round, you cast on enough stitches to fit around the head, join carefully without twisting, and knit the band to your desired width. You can use ribbing, garter-style texture, seed stitch, broken rib, cables, lace, or any stitch pattern that works well in the round.

The biggest benefit of knitting an ear warmer in the round is that there is no seam to sew at the end. Once you bind off, weave in your ends, and block if needed, the ear warmer is ready to wear.
This method is especially nice for simple textured headbands because the finished piece looks clean and smooth all the way around. It is also a good choice if you do not enjoy seaming or if you want the ear warmer to have the same look across the full band.
When knitting ear warmers in the round, make sure the cast-on edge is stretchy enough to fit comfortably over the head. A tight cast on can make the finished ear warmer hard to wear, even if the rest of the fabric has plenty of stretch.
How Do You Knit Ear Warmers Flat and Sew Them Together?
Another simple way to knit ear warmers is to work them flat in rows and sew the ends together when you are done. This is a great option if you prefer straight needles, if your stitch pattern is easier to work flat, or if you want more control over the final finish.
When you knit an ear warmer flat, you usually cast on stitches for the width of the band and knit until the strip is long enough to fit around the head. Then the short ends are joined together using the finishing method that best matches the look you want.

A basic sewn seam is the easiest option. You place the two short ends together and use a tapestry needle to sew them into a loop. This works well for beginner ear warmer knitting patterns and simple everyday styles.
You can also use Kitchener stitch if you want a grafted finish that blends the two ends together more smoothly. This can be a pretty choice when you want the seam to be less noticeable, though it works best when the stitch pattern is easy to graft.
A 3 needle bind off is another sturdy option. For this method, you keep the stitches live on two needles and bind them off together from the wrong side. It creates a neat seam and works especially well when you want a strong join without hand sewing the ends.
If you want a twisted ear warmer, you can sew the ends together in a way that creates a front knot or twist. To do this, fold the ends so they overlap in an alternating stack, then sew through all the layers. When turned right side out, the seam pulls into a twist at the front.
This twisted finish is a fun way to make a simple rectangle look more styled. It is also a great choice for plain ribbing or garter stitch because the twist adds interest without needing a complicated stitch pattern.
What Ear Warmer Patterns Should You Knit Next?
If you want to practice how to knit ear warmers, these free headband knitting patterns are a great place to start:
• Hezekiah Headband
• Love Came Down Headband
• Peace Headband
• Martha Headband
• Cedar Headband
Each of these patterns gives you a different way to enjoy knitted ear warmers, whether you like simple texture, pretty stitch details, or a warm practical fit. Headbands are also easy to customize because you can adjust the width, yarn, and length to make the finished piece work for your style.
Ear warmers are one of my favorite small knitting projects because they are fast, useful, and easy to tuck into your project bag. They make wonderful gifts, but they are also the kind of thing you can knit for yourself and actually wear all season.

Once you learn the basic construction, you can use almost any stitch pattern to create something new. That makes ear warmers a perfect project for experimenting without committing to a large knit.

Have you tried knitting ear warmers in the round, or do you prefer knitting them flat and sewing them together? I would love to hear which method you like best in the comments.
This post may contain affiliate links, which means I may earn a small commission if you make a purchase through one of my links at no extra cost to you.
The post How to Knit Ear Warmers: Simple Headband Styles for Warm and Pretty Knitting Projects appeared first on The Knit in the Womb Blog.


